How to Build Your Own Lifting Platform
Building a platform is pretty simple. If you are not talented with an electric drill, find a friend who is. You’ll want a tough person to help you move the pieces of plywood and you need a way to get the plywood to your house. Those are about the most demanding requirements.
You can watch several Youtube videos that will show you ways to do it. It is not hard. I’ve included several photos below.
Time
We could have gone to the hardware store, bought the wood, placed it in our house, and had this finished in about 5 total hours. However, we added 6 coats of stain / polyurethane, and we used glue instead of screw in one area. Those choices increased our time to 3 days because stuff had to dry.
Supplies
1) 4 x 8 foot pieces of plywood. 3/4” thick or very close to it. Some of it is closer to .6 inches thick. You will need 4 pieces of medium to high quality. Then, add one more piece to your list (3/4”) that is higher quality. This piece will end up on top. Do not get a finished and stained piece - just my preference. Make sure the wood you buy is not warped.
2) Farm supply stores have 3/4” rubber mats. You can also buy them online. You will need to end up with sheets of rubber that are 2 feet wide. We are buying a 4 x 6 foot piece and cutting it in half ( 2 x 2’ x 6’).
3) We are using about 80 screws that are 1.25 inches long. We also purchased a dark wood stain, a tube of Gorilla Glue, and a paint brush. We already have an electric drill, extension cord, screw bit, and drill bit.
Procedures
1) Sweep the area where you want the floor and place 2 of the pieces of 4 x 8 plywood side by side where you want the platform to be. Get them perfectly aligned. You should be looking at an 8 x 8 platform now.
2) Place the next two pieces of plywood on top of the first two. Have them face a different direction. Get them perfectly aligned. You should still be looking at an 8 x 8 platform… it is just 2 pieces of plywood thick at this point.
a) Now that all four corners are perfectly aligned and you have DOUBLE checked… drop about 60-80 of the 1.25” screws into the plywood base. Space them out and do not get too close to the edges or you may crack the wood. You could drill a pilot hole - we elected not to for this layer. Our screws are about 4 inches from the perimeter, with a few spaced out throughout the middle.
3) Now, place the nicer piece of plywood on top. Space it out so there is exactly 2 feet on each side - you will be creating the edges where your rubber mats will go at the end. We did NOT use screws for this piece of wood. This is the piece that will be visible, and we don’t want screws visible.
a) We got the top piece completely even on all 4 sides. There is 24” on both sides, from end to end - perfectly even. This is a good point to double check your work.
b) Next, we lifted one corner of the top (nicer) board up and placed wood glue between the two boards. We used a good “squirt” that is about the size a drinking glass bottom (much bigger than a quarter). We placed that amount of glue on all four corners to help glue the top (nice) board to the bottom platform. We also placed a squirt at the midway point of the wood. We did that on the left and right sides. Too much glue may make it difficult to take apart. We wanted just enough to keep the wood from moving during exercise. If needed, I can still pry it apart without splintering everything.
Once we applied the glue we remeasured the edges of the top piece of wood and placed weights on top to help the glue cure overnight. We then remeasured again! I’ve got about 60 minutes invested in the project so far.

This picture may help - The rubber will be placed on the edges of this platform AFTER we stain the center piece and put some polyurethane on top of everything. I’m allowing 3 days for this project. I could do it in 2 hours if I didn’t care about the finished look of the platform. You are looking at a total of 5 pieces of plywood that measure 4 feet by 8 feet each.

This is what it looks like after Step 3 - BEFORE the glue was added. The outer perimeter is 8 feet by 8 feet. There are 2 pieces of plywood on the bottom, 2 more pieces in the middle (turned the opposite direction), and one piece of plywood on top - that we will be gluing down next. You could screw the top board down, but we wanted it to look nicer.

Regarding the 2 bottom layers (4 total pieces of plywood), we used 1.25 inch screws around the perimeter (not too close to the edge) and we also placed a few in the middle. We spaced out about 80 total screws on the 8 x 8 platform. I added more screws after this picture was taken and I could feel the difference / added stability in the board. Again, we ended up with about 80 screws evenly spaced out.

Once the basic platform was square and the glue had cured I added 3 coasts of a dark wood stain.

Notice that I built an extension (not necessary for Olympic lifting). I then added 3 coats of a high gloss polyurethane - this is not the same as wood stain. Therefore, there are 6 coats between the bare wood and the equipment on top.
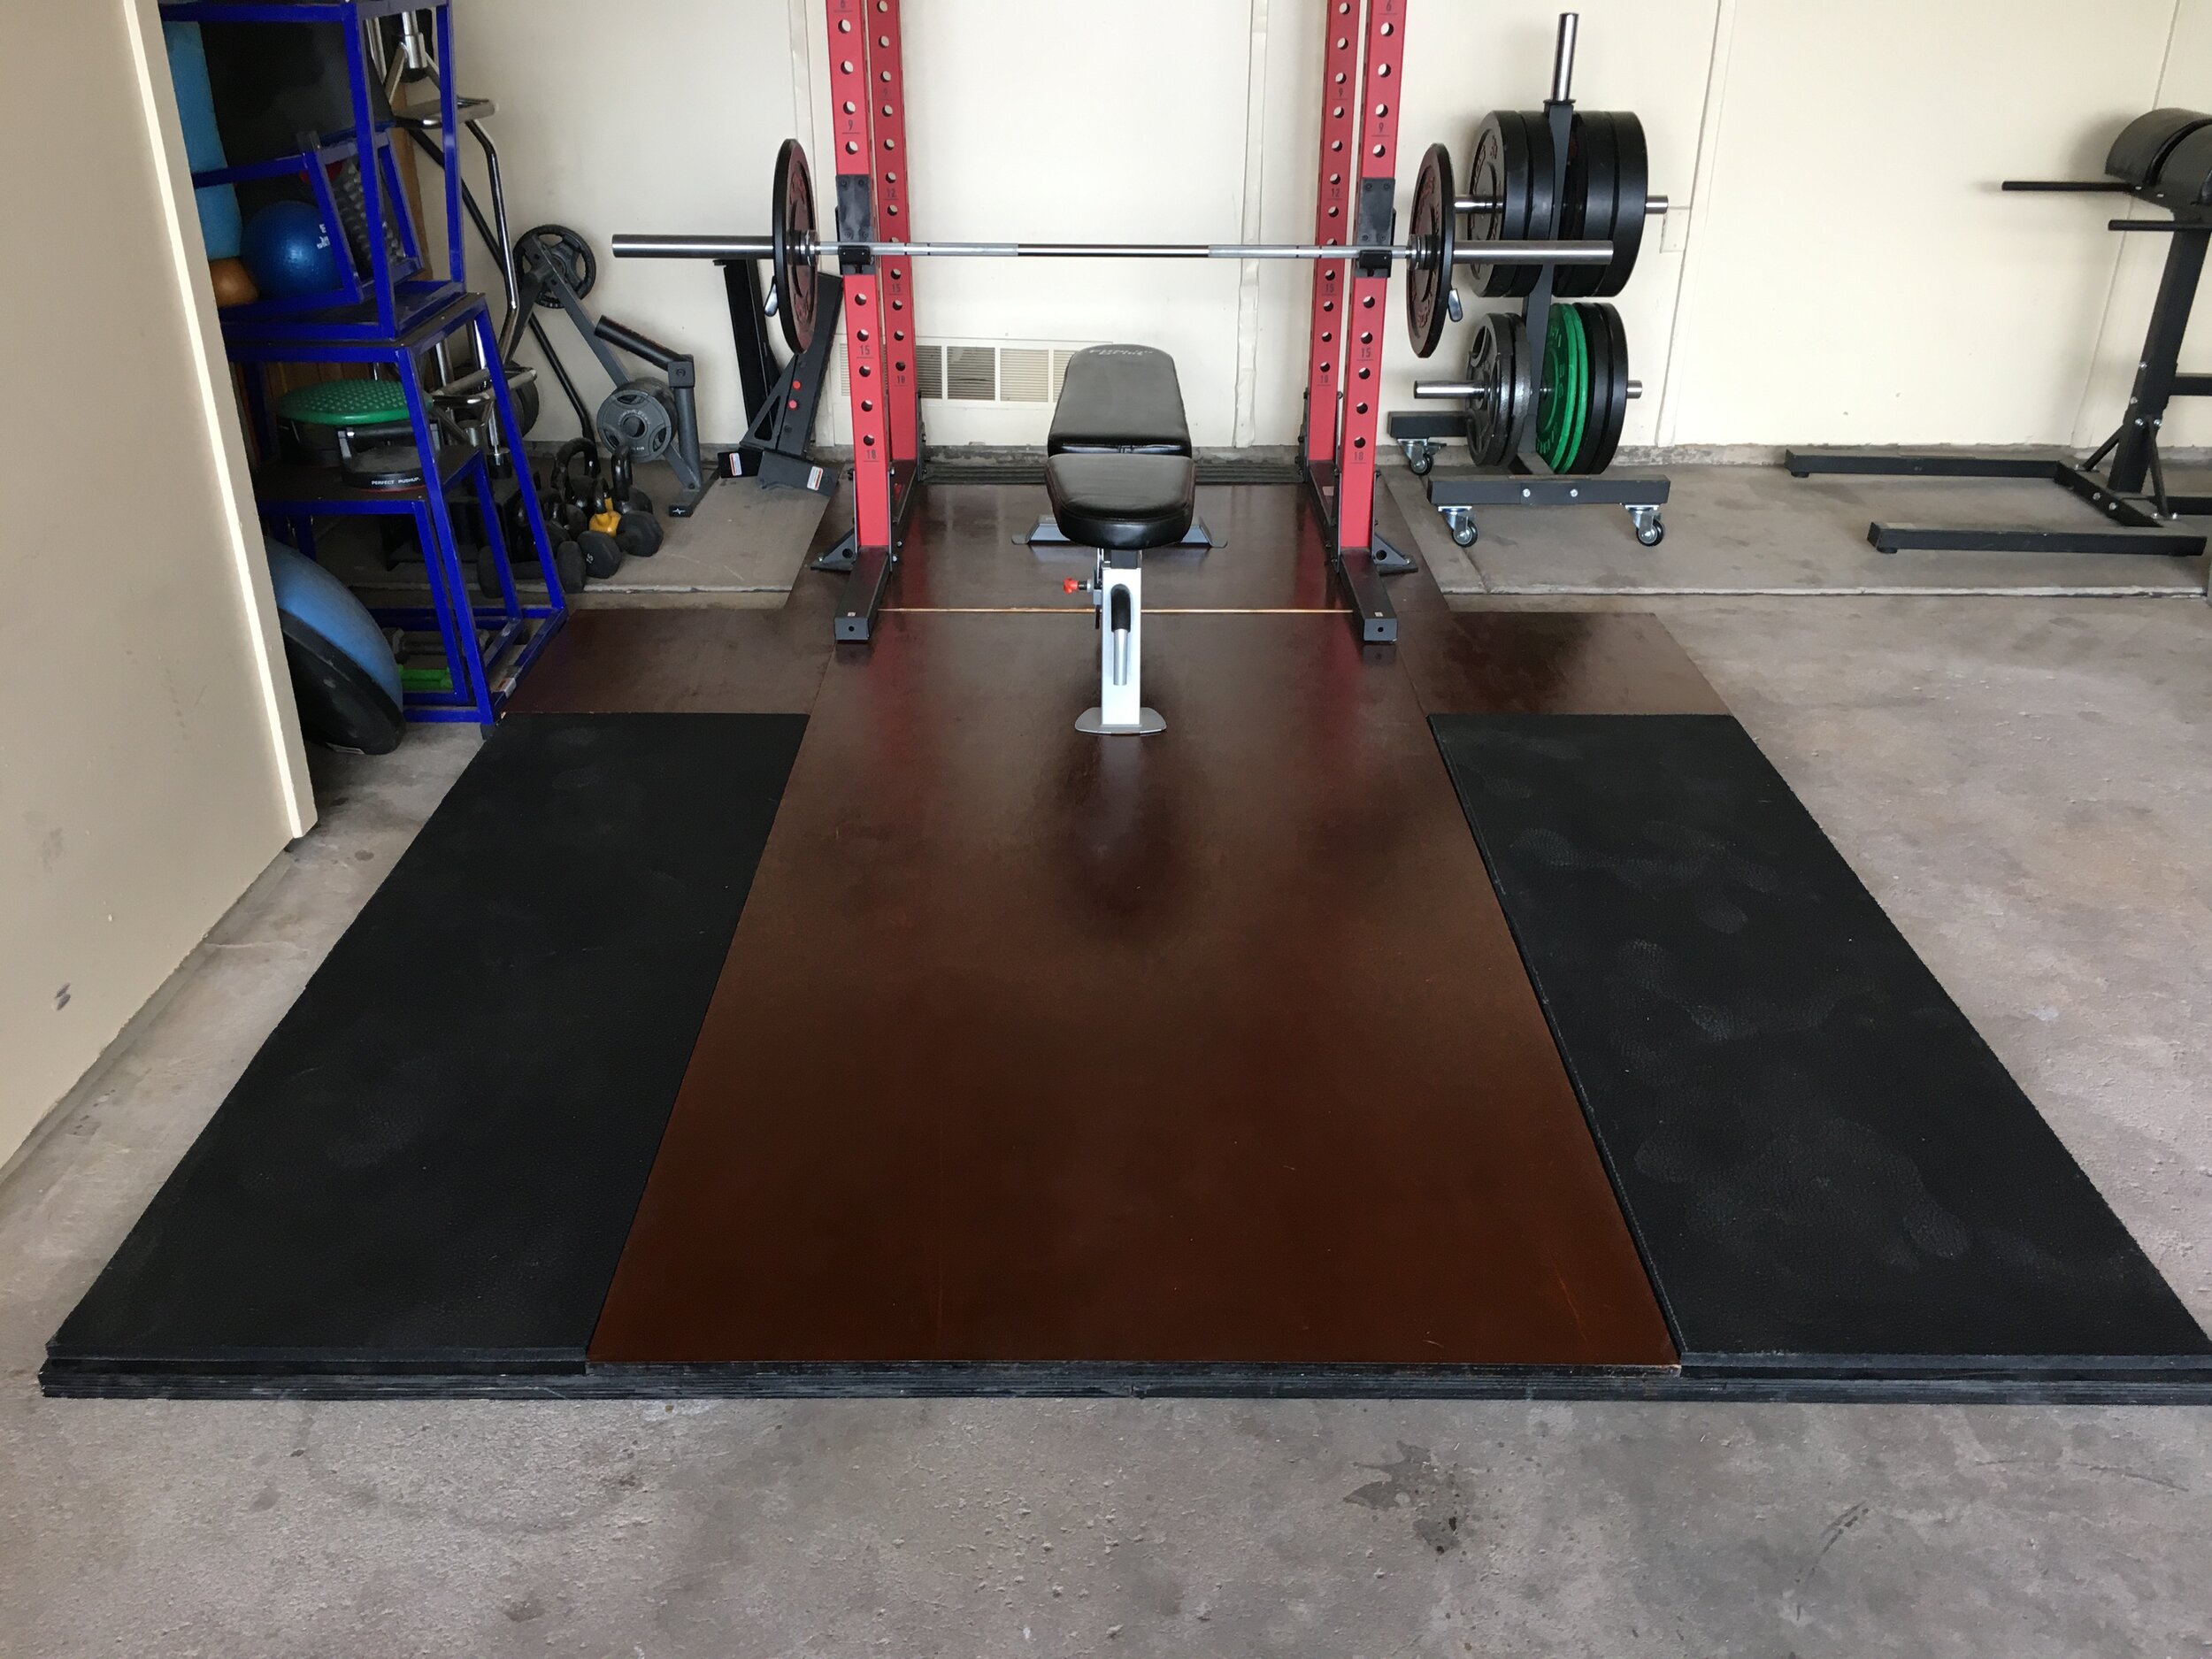
Here is the final product with the weight cage bolted to the extension that I built. You may want some shims (small pieces of wood) that you can use to level off the platform. Our garage has a slight incline / grade - the shims help balance it out and keep weights from rolling. This collects a lot of dust and dirt from the dry winds in our area. The six coats allow us to clean it mostly with a broom - occasionally with a slightly damp towel. Bottom line - it works great and was more affordable than buying and shipping a pre-made floor.